Wireguard GUI
WireGuard is a modern, simple, and fast VPN protocol designed to be easy to configure and highly secure.
WireGuard GUI is a graphical interface designed to make it easier for users to configure and manage their WireGuard VPN connections — without needing to edit configuration files manually.
🚀 Quick Start
Section titled “🚀 Quick Start”- Launch the Ghaf Control Panel
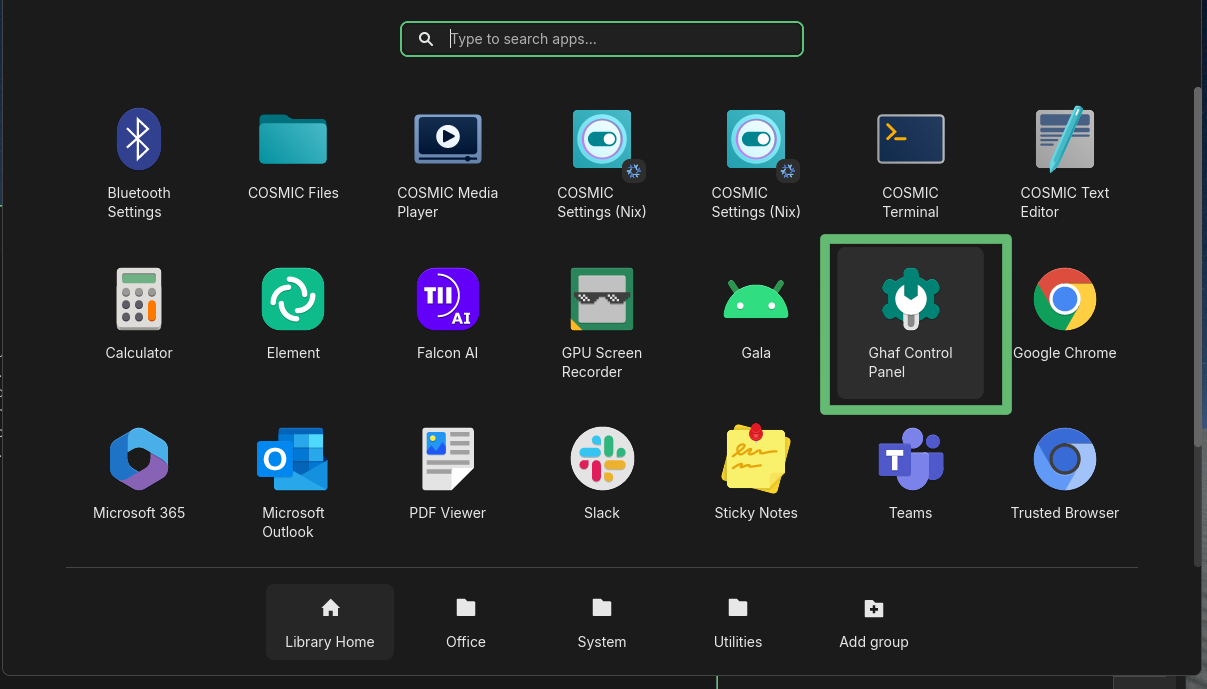
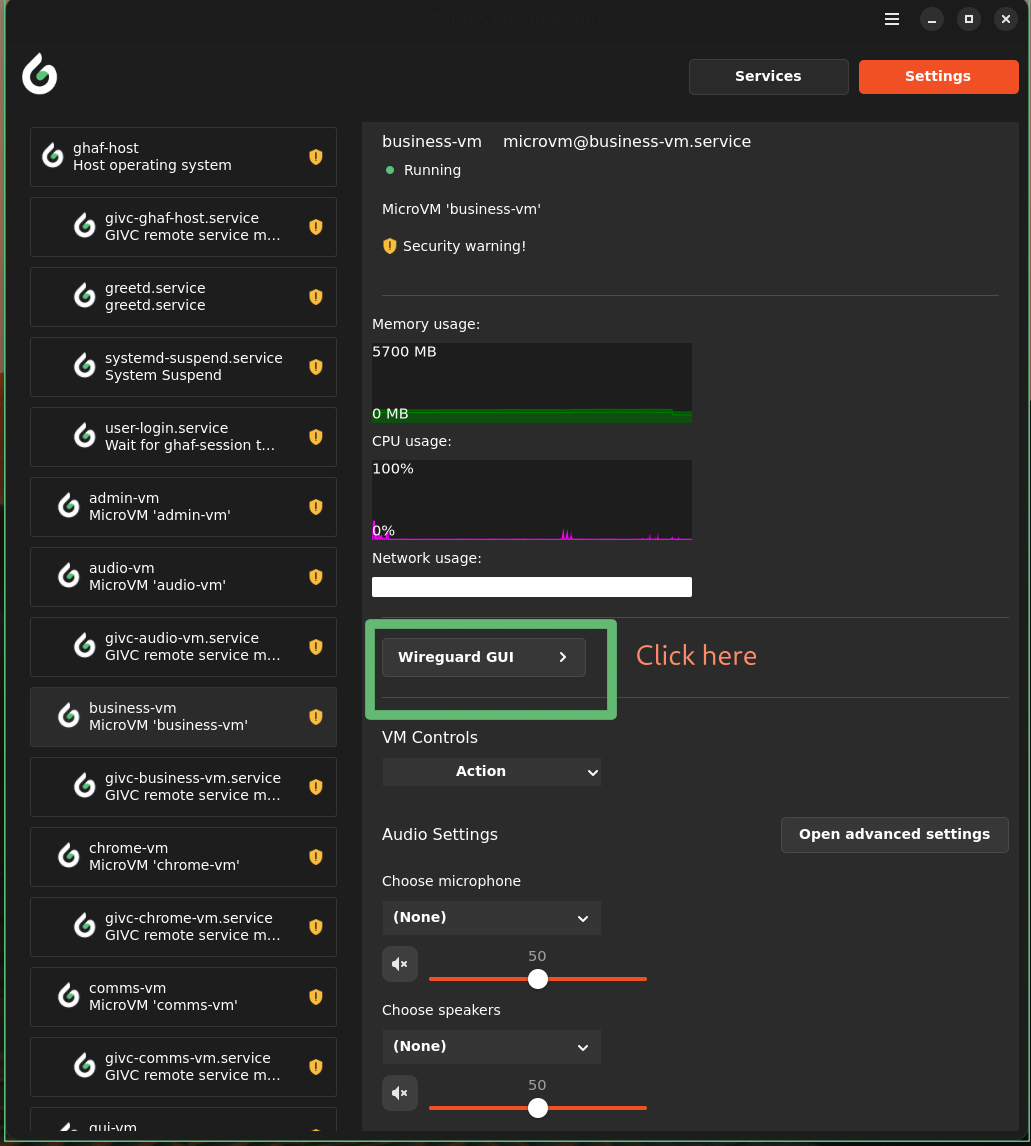
- Click the
WireGuard GUIbutton
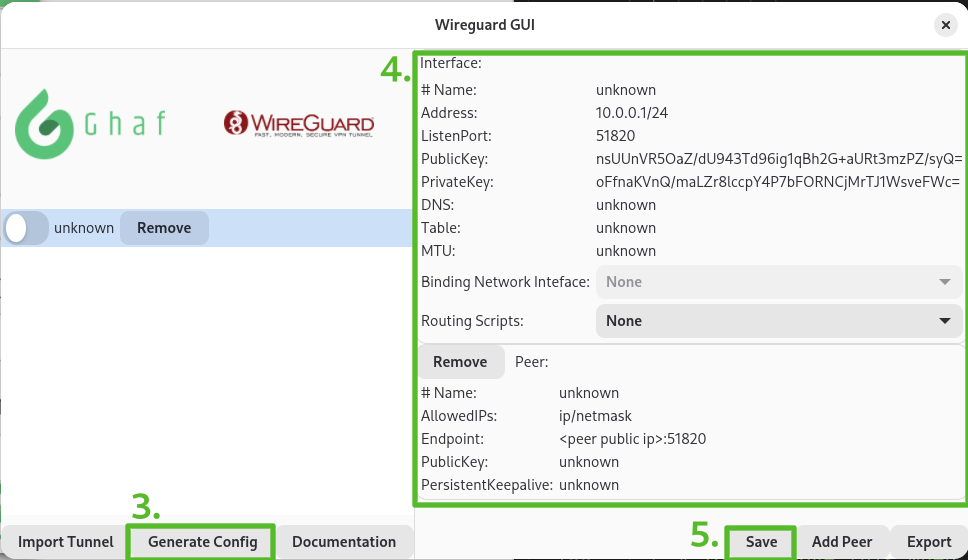
- Click the
Generate Configbutton to generate a new tunnel configuration, which will appear on the list with theunknownname - Enter your configuration details for required sections such as
# Name,# Address, etc. - Click the
Savebutton — a confirmation dialog will appear once the configuration is saved successfully
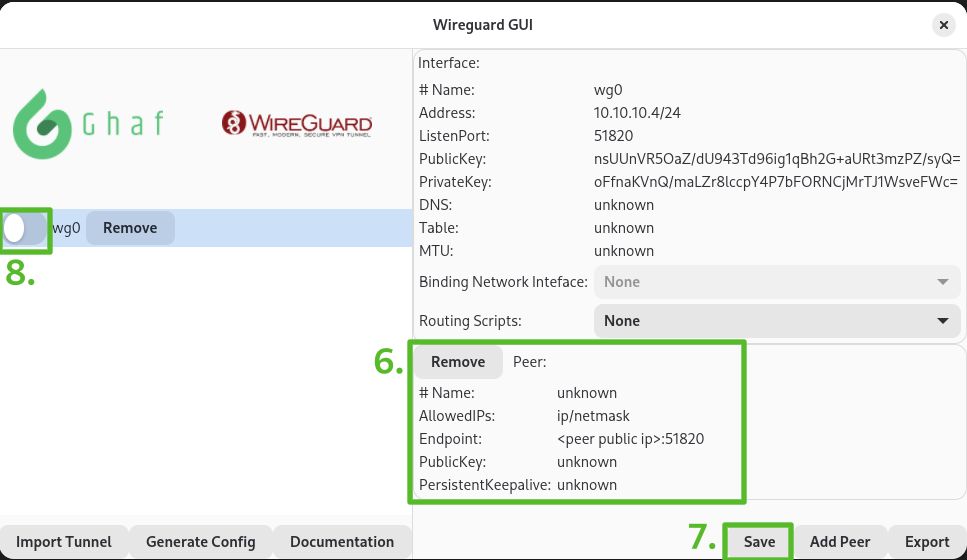
- Enter your peer configuration details such as
AllowedIPs,Endpoint, andPublicKey - Click
Save— a confirmation dialog will appear once the configuration is saved successfully - Use the toggle switch to turn the WireGuard tunnel interface on or off
⚙️ Configuration Scenarios
Section titled “⚙️ Configuration Scenarios”
1. Split-tunnel VPN as client
Section titled “1. Split-tunnel VPN as client”Use this configuration if you want only specific traffic to pass through the VPN tunnel, while other traffic goes through your normal network connection.
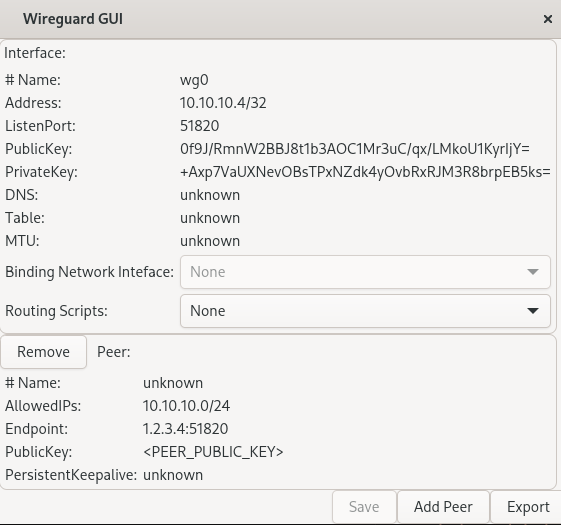
You can try to ping: ping 10.10.10.0
2. Full-tunnel VPN as client
Section titled “2. Full-tunnel VPN as client”Use this mode if you want all network traffic to be routed through the VPN tunnel for maximum privacy and encryption.
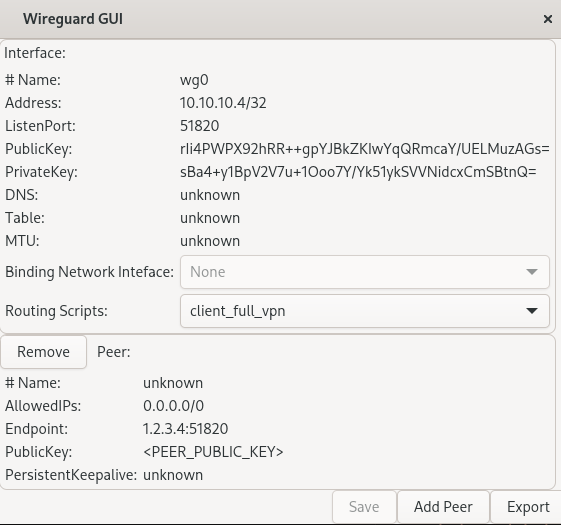
You can run curl ifconfig.me command from chrome-vm and response should be vpn server’s public IP. For our case it should be 1.2.3.4
3. VPN as server
Section titled “3. VPN as server”Configure WireGuard as a server to accept connections from multiple clients.
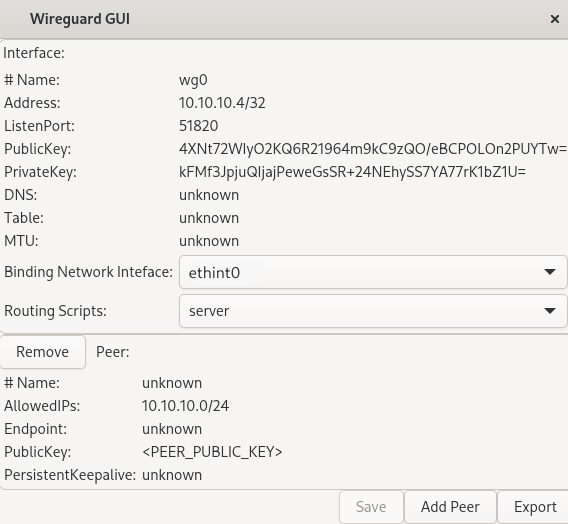
You can try to ping from test client: ping 10.10.10.4
🔍 Troubleshooting
Section titled “🔍 Troubleshooting”If the WireGuard GUI is not visible or not working as expected, you can check system logs for more details.